Nutty Bliss No-Bake Energy Balls Recipe
Introduction
In recent years, no-bake snacks have surged in popularity, becoming a go-to option for those seeking convenience without sacrificing nutrition. These quick, easy-to-make treats are perfect for busy lifestyles, providing a satisfying boost of energy while keeping health in mind. Among the myriad of no-bake recipes, Nutty Bliss No-Bake Energy Balls stand out as a delicious, nutrient-packed option that can be enjoyed any time of day.
Homemade energy balls offer a variety of benefits, including full control over the ingredients you use. This means you can tailor each batch to your dietary needs and preferences, ensuring that every bite is not only tasty but also healthy. Whether you are looking for a pre-workout snack, a midday pick-me-up, or a sweet treat to satisfy your cravings, Nutty Bliss No-Bake Energy Balls are the perfect solution.
Understanding No-Bake Energy Balls
No-bake energy balls are bite-sized snacks made without the need for an oven. Typically crafted from a combination of whole food ingredients, they are packed with nutrients that provide sustained energy. The appeal of these snacks lies in their simplicity and versatility. With countless flavor combinations and dietary accommodations, they can cater to a wide range of tastes and preferences, including vegan, gluten-free, and nut-free options.
When it comes to nutrition, energy balls are a powerhouse. They often include ingredients such as oats, nuts, and natural sweeteners that are high in fiber, healthy fats, and protein. This combination not only helps to keep you full longer but also provides essential vitamins and minerals. Additionally, the absence of refined sugars in homemade versions means you can indulge without the guilt.
Ingredients Breakdown
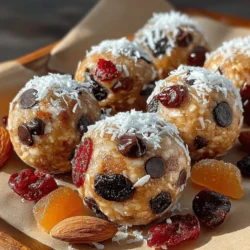
To create the Nutty Bliss No-Bake Energy Balls, you’ll need a selection of wholesome ingredients, each contributing to the overall flavor and nutritional profile of the final product. Let’s take a closer look at each component and its role in this delightful recipe:
– Rolled Oats: As the base of our energy balls, rolled oats serve as an excellent source of fiber and energy. They help to bind the ingredients together while providing a chewy texture that makes each bite satisfying.
– Natural Peanut Butter: This creamy ingredient is not only delicious but also rich in healthy fats and protein. Natural peanut butter adds creaminess, enhancing the overall flavor while contributing to the energy-boosting properties of the energy balls.
– Honey or Maple Syrup: Both honey and maple syrup act as natural sweeteners, providing just the right amount of sweetness without the refined sugars found in many store-bought snacks. They also offer health benefits, including antioxidants and vitamins.
– Mixed Nuts: A blend of mixed nuts adds a delightful crunch and an extra boost of nutrition. Nuts are packed with healthy fats, protein, and essential vitamins and minerals, making them a perfect addition to energy balls.
– Dark Chocolate Chips: For those who enjoy a hint of indulgence, dark chocolate chips add a touch of sweetness and richness. Additionally, dark chocolate is rich in antioxidants, offering health benefits along with its delicious flavor.
– Shredded Coconut: This ingredient adds a unique texture and a subtle sweetness. Shredded coconut is a source of healthy fats and can help enhance the flavor profile of the energy balls.
– Dried Cranberries or Raisins: These naturally sweet fruits provide a burst of flavor and additional vitamins. Their chewiness complements the other ingredients, making each bite even more enjoyable.
– Vanilla Extract: A splash of vanilla extract enhances the overall flavor complexity, adding a warm, inviting aroma that makes these energy balls even more appealing.
– Salt: A small amount of salt is crucial for balancing the sweetness of the other ingredients. It enhances the overall flavor, ensuring that each bite is deliciously satisfying.
Step-by-Step Instructions
Mixing the Base
To begin your Nutty Bliss No-Bake Energy Balls, gather all your ingredients in one place. This makes the process smoother and ensures you won’t miss any crucial components. In a large mixing bowl, combine the rolled oats and natural peanut butter, stirring until they are well blended. The peanut butter will help bind the oats together, creating a solid base for your energy balls.
Next, add your choice of honey or maple syrup to the mixture. This natural sweetener not only contributes flavor but also helps to hold the ingredients together. Use a spatula to mix everything thoroughly until the mixture starts to hold together. It should be sticky but not overly wet. If the mixture seems too dry, feel free to add a bit more peanut butter or sweetener to achieve the desired consistency.
Achieving the Right Consistency
The key to perfect no-bake energy balls lies in achieving the right consistency. You want the mixture to be moldable but not crumbly. If it seems too sticky, you can add a little more rolled oats or nuts to balance it out. On the other hand, if it is too dry, adding a touch more peanut butter or a few drops of water can help.
Once you reach the desired consistency, it’s time to add the fun ingredients that will give your energy balls their unique flavor and texture. Consider folding in mixed nuts for that crunch factor, as well as dark chocolate chips for a rich, indulgent touch. Don’t forget to include shredded coconut, which adds a lovely tropical flavor and chewiness.
Adding Crunch and Flavor
To finish off your mixture, toss in the dried cranberries or raisins. These sweet additions not only enhance the flavor but also contribute vitamins and a burst of natural sweetness. Finally, add a splash of vanilla extract and a pinch of salt to balance out the sweetness from the honey or maple syrup and enhance the overall taste.
Once all the ingredients are well incorporated, it’s time to shape your energy balls. Take a small portion of the mixture and roll it into a ball using your hands. Aim for about one-inch in diameter; this size is perfect for a quick snack. Repeat the process until all the mixture has been shaped into balls.
The Nutty Bliss No-Bake Energy Balls are now ready for chilling. Place them on a parchment-lined baking sheet or an airtight container and refrigerate for at least 30 minutes. This will help them firm up, making them easier to handle and giving them a delightful chewy texture.
Stay tuned for the next part of the article, where we will explore more about the benefits of these energy balls and how to store them for maximum freshness.
{{image_2}}
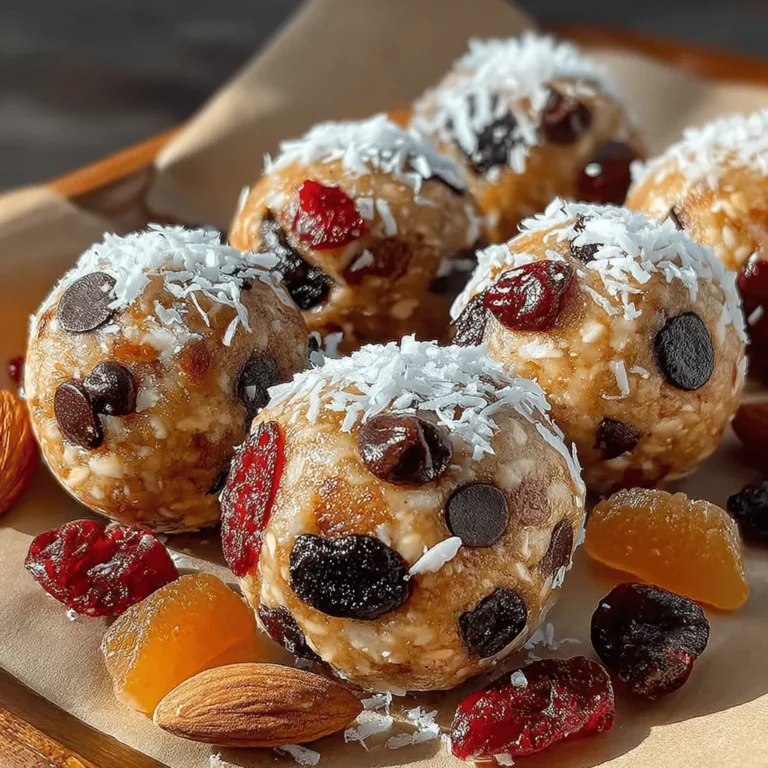
Importance of Evenly Distributing Ingredients for Optimal Taste
One of the keys to creating perfect Nutty Bliss No-Bake Energy Balls lies in the even distribution of ingredients. Each bite should deliver a harmonious blend of flavors and textures, ensuring that no single ingredient overpowers the others. To achieve this, it is essential to mix the ingredients thoroughly before forming the energy balls. Using a sturdy mixing bowl and a spatula or wooden spoon, blend the mixture until all components—nuts, oats, sweeteners, and any add-ins—are fully incorporated. This can take a few minutes, but the end result will be a well-balanced treat that is satisfying and delicious.
Forming the Balls
Techniques for Rolling Uniform Energy Balls and Size Variations
Once your mixture is well-combined, it’s time to form the energy balls. This step can be both fun and rewarding. To ensure uniform size, consider using a small cookie scoop or a tablespoon to measure out portions of the mixture. This method not only guarantees consistency but also allows for easy handling.
1. Scoop the Mixture: Use your chosen tool to scoop out a portion of the mixture.
2. Roll Into a Ball: With clean hands, gently roll the mixture between your palms to create a smooth ball. Aim for about 1 inch in diameter for a classic bite-sized treat.
3. Size Variations: If you prefer larger energy balls, feel free to increase the size; just remember that larger balls will require more time to chill. Conversely, smaller balls may be more convenient for snacking, especially for kids.
Chilling for Firmness
Explanation of the Chilling Process and Its Significance for Texture
After shaping the energy balls, placing them in the refrigerator is crucial. Chilling helps to firm up the mixture, making them easier to handle and enhancing their texture. It allows the ingredients to set and bind together, resulting in a chewy yet satisfying energy ball.
1. Chill Time: Place the rolled energy balls on a parchment-lined baking sheet or plate, and cover them with plastic wrap. Allow them to chill in the refrigerator for at least 30 minutes. This not only firms them up but also enhances flavor as the ingredients meld together.
2. Texture Benefits: The chilling process improves the overall mouthfeel of the energy balls. A well-chilled energy ball should have a slight chewiness from the oats and nut butter, complemented by the crunch of nuts and seeds.
Storing and Enjoying
Best Practices for Storage and Longevity of Freshness
To keep your Nutty Bliss No-Bake Energy Balls fresh and delicious, proper storage is essential. Here are some best practices to ensure maximum longevity:
1. Airtight Container: Store the energy balls in an airtight container to prevent them from drying out. This helps maintain their moisture and flavor.
2. Refrigeration: Energy balls can last for about a week in the refrigerator. If you want to extend their shelf life, consider freezing them. They can be stored in the freezer for up to three months.
3. Thawing: When you’re ready to enjoy a frozen energy ball, simply remove it from the freezer and let it sit at room temperature for 10-15 minutes before eating. This will soften them slightly while maintaining their delightful texture.
Nutritional Information
Approximate Nutritional Breakdown per Energy Ball
For those mindful of their dietary intake, Nutty Bliss No-Bake Energy Balls are a nutritious option. Here’s a general breakdown of the nutritional content per energy ball (based on a recipe yielding around 12 balls):
– Calories: Approximately 120
– Protein: 4g
– Carbohydrates: 14g
– Dietary Fiber: 2g
– Sugars: 5g
– Fats: 6g
Health Benefits Related to Energy Levels, Snacking, and Workout Performance
These energy balls are not just tasty; they also provide numerous health benefits. Rich in healthy fats, protein, and fiber, they are an excellent choice for:
– Sustained Energy: The combination of oats and nut butter provides a slow release of energy, making them perfect for a mid-afternoon snack or as a pre-workout boost.
– Balanced Snacking: Energy balls can help curb cravings and prevent unhealthy snacking, thanks to their satisfying texture and flavor profile.
– Workout Performance: Consuming energy balls before or after a workout can help refuel your body and support muscle recovery due to their protein content.
Serving Suggestions
Creative Ways to Enjoy Nutty Bliss Energy Balls
Nutty Bliss No-Bake Energy Balls are versatile and can be enjoyed in several ways. Here are some creative serving suggestions:
1. Pairing with Fresh Fruit: Serve energy balls alongside fresh fruit, such as apple slices or banana halves, for a balanced snack that combines fiber, vitamins, and minerals.
2. Incorporating into Lunch Boxes: These energy balls make excellent additions to lunch boxes for both children and adults. Their portability and nutritional content make them a perfect choice for a healthy snack on the go.
3. Pre- or Post-Workout Snack: Enjoy one or two energy balls as a convenient pre- or post-workout snack to enhance performance and recovery. They provide the necessary fuel to keep you going during exercise and help replenish energy afterward.
Customization Options
Suggestions for Alternative Ingredients Based on Taste Preferences or Dietary Needs
One of the best aspects of Nutty Bliss No-Bake Energy Balls is their adaptability. Here are some customization options to cater to various taste preferences and dietary needs:
1. Alternative Nut Butters: Swap peanut butter for almond butter or cashew butter for a different flavor profile. Each nut butter brings its unique taste and nutritional benefits.
2. Sweetener Variations: Instead of using regular honey or maple syrup, try agave nectar, coconut nectar, or a sugar-free sweetener to suit your dietary preferences.
3. Add-Ins: Incorporate seeds (such as chia or flaxseeds) for an extra crunch and additional nutrients. Dried fruits like cranberries, raisins, or apricots can also enhance sweetness and flavor while adding a chewy texture.
Conclusion
Nutty Bliss No-Bake Energy Balls are more than just a quick snack; they’re a delightful blend of taste and nutrition that embodies the essence of healthy eating. With their easy preparation and the ability to customize ingredients to fit personal preferences, they offer a world of possibilities.
Whether you’re looking for a convenient snack to fuel your day, a wholesome treat for your lunch box, or a nutritious pre- or post-workout option, these energy balls have got you covered. The joy of creating homemade treats with wholesome ingredients is unmatched, and it encourages a healthier approach to snacking.
So, gather your ingredients, have fun experimenting with flavors, and enjoy the satisfaction that comes from making your own Nutty Bliss No-Bake Energy Balls. With their health benefits and delicious taste, you’ll find that they make the perfect addition to your healthy lifestyle.