
Introduction
Sticky orange glazed chicken is a delightful dish that perfectly balances sweet and savory flavors, making it a favorite among both children and adults. This vibrant meal not only tantalizes the taste buds with its rich, citrusy glaze but also adds a splash of color to your dinner table, making it an eye-catching choice for family gatherings or weeknight dinners. The simplicity of preparation means that even novice cooks can create this dish without feeling overwhelmed.
In addition to its mouthwatering taste and visual appeal, this recipe is packed with health benefits. Using chicken thighs provides a juicy and flavorful base, and when paired with fresh, wholesome ingredients like oranges, honey, and ginger, it transforms into a nutritious option that’s both satisfying and nourishing. With its combination of tender meat and a glossy glaze, sticky orange glazed chicken is a dish that promises to impress.
Understanding the Ingredients
To make the most delicious sticky orange glazed chicken, it’s essential to understand the role of each ingredient in the recipe. The star of the dish is, of course, the chicken thighs. Unlike chicken breasts, which can dry out easily, thighs are succulent and rich in flavor, making them perfect for this recipe. They hold moisture well during cooking, ensuring that every bite is juicy and tender.
Next, we have olive oil, which is not only a heart-healthy fat but also aids in achieving that perfect sear on the chicken. When selecting your olive oil, opt for extra-virgin for its robust flavor and health benefits.
The glaze itself is made up of a few key components: fresh oranges, honey, garlic, ginger, and low-sodium soy sauce. Fresh oranges not only provide a bright, zesty flavor but also bring a wealth of vitamin C and antioxidants. Honey adds a natural sweetness that complements the tartness of the oranges and contributes to the sticky texture of the glaze.
Ginger and garlic are critical for depth of flavor; their aromatic qualities enhance the overall dish, providing warmth and a slight heat that balances the sweetness. Lastly, using low-sodium soy sauce is crucial for maintaining a healthy profile while still delivering that umami punch. This choice reduces the salt content without sacrificing flavor, allowing the other ingredients to shine.
Preparing the Chicken
Before diving into cooking, proper preparation of the chicken thighs is vital for achieving the best results. Start by trimming any excess fat from the thighs; this step not only improves the dish’s overall presentation but also reduces greasiness. After trimming, pat the chicken thighs dry with paper towels. This step is often overlooked, but it is crucial for achieving a golden-brown crust during searing. Moisture on the surface of the chicken can prevent it from browning properly, leading to a less appealing texture.
Once the chicken is dry, season it generously with salt and pepper. This base seasoning enhances the natural flavors of the chicken and ensures that each bite is flavorful. You can also add a sprinkle of garlic powder or onion powder for an extra layer of taste if desired. Allow the seasoned chicken to rest for a few minutes, giving the salt time to penetrate the meat and further enhance its flavor.
Searing the Chicken
Now that the chicken is prepped, it’s time to move on to the searing process, which is critical for flavor development. Heat a large skillet over medium-high heat and add a drizzle of olive oil. Once the oil is hot, carefully place the chicken thighs in the skillet, skin-side down if using skin-on thighs. Make sure not to overcrowd the pan; cooking in batches is often necessary to ensure even cooking and an optimal sear.
Searing is all about achieving that beautiful golden-brown crust, a result of the Maillard reaction—an essential process that occurs when proteins and sugars in the meat react to heat, creating complex flavors and appealing colors. Allow the chicken to sear undisturbed for about 5-7 minutes, or until it releases easily from the pan and is nicely browned. Flip the chicken and sear the other side for an additional 5-7 minutes.
It’s essential to monitor the heat; if the pan is too hot, the sugars can burn, resulting in a bitter flavor. Conversely, if it’s too low, the chicken will steam instead of sear. To ensure the chicken cooks through while remaining juicy, use a meat thermometer to check for doneness; the internal temperature should reach 165°F.
Once the chicken is beautifully seared, remove it from the skillet and set it aside, allowing it to rest while you prepare the glaze.
Creating the Orange Glaze
Creating the sticky orange glaze is the final touch that elevates this dish from good to extraordinary. Start by incorporating the aromatic ingredients: minced garlic and grated ginger, which should be added to the same skillet used for the chicken. This not only infuses the glaze with rich flavor but also allows you to capture the fond—the browned bits left in the pan from searing the chicken.
Sauté the garlic and ginger over medium heat for about 1-2 minutes, until fragrant. Be cautious not to let them burn, as this can impart a bitter taste to the glaze. Next, add the freshly squeezed orange juice and zest to the skillet, stirring to combine with the sautéed aromatics. The zest will intensify the orange flavor, adding brightness to the glaze.
Following the orange juice, drizzle in the honey and low-sodium soy sauce. The honey will create that coveted stickiness, while the soy sauce adds a savory depth to balance the sweetness of the honey and citrus. Stir the mixture and bring it to a gentle simmer, allowing the glaze to reduce and thicken slightly. This process will concentrate the flavors, making the glaze even more irresistible.
As the glaze simmers, taste and adjust the seasoning as necessary. If you prefer a bit more acidity, a splash of rice vinegar can be added for an extra kick, while additional honey can enhance sweetness if desired.
With the glaze prepared, you’re now ready to combine it with the seared chicken thighs to create a dish that is not only delicious but visually stunning as well.
Stay tuned for the next part of this article, where we will explore how to finish the dish and serve it for a truly memorable meal.
{{image_2}}
Simmering the Sauce to Concentrate Flavors
Simmering the sauce is a crucial step in achieving the rich, vibrant flavor profile of sticky orange glazed chicken. When you allow the sauce to simmer, it reduces and thickens, intensifying the flavors and creating a more complex taste experience. This process not only enhances the sweetness of the orange juice but also allows the garlic and ginger to infuse their aromatic qualities into the mixture.
As the sauce simmers, you’ll notice it thickens slightly, which is essential for a glaze that clings beautifully to the chicken. Aim for a gentle simmer — too vigorous, and you risk boiling away the delicate flavors. Keep an eye on the sauce and stir occasionally to prevent sticking and ensure an even reduction.
Thickening the Sauce
To achieve the perfect glaze consistency, you may want to consider using a cornstarch-water mixture, especially if your sauce hasn’t thickened to your liking after simmering. This optional step can make a significant difference in the texture of your glaze.
Creating the Cornstarch Mixture
1. In a small bowl, mix 1 tablespoon of cornstarch with 2 tablespoons of cold water. Stir until it forms a smooth slurry.
2. Gradually add this mixture to the simmering sauce while stirring continuously. This will help prevent lumps from forming.
Achieving the Right Consistency
The goal is to reach a glossy, sticky consistency that coats the back of a spoon. If the glaze seems too thick, you can loosen it with a splash of orange juice or chicken broth. Conversely, if it’s too thin, continue to simmer for a few more minutes until it reaches your desired thickness.
Adjusting Sweetness and Acidity
Taste the sauce once it thickens; you might want to tweak the sweetness or acidity to suit your palate. If you prefer a sweeter glaze, a touch of honey or maple syrup can elevate the flavor. If you enjoy a tangier profile, add a splash of rice vinegar or extra orange juice. Adjust gradually, tasting as you go to ensure the perfect balance.
Glazing the Chicken
Once your sauce is ready, it’s time to glaze the chicken. This step is vital for ensuring that each piece is beautifully coated and infused with the rich flavors of the sauce.
Returning Chicken to the Skillet
1. After the sauce has thickened, return the seared chicken pieces to the skillet.
2. Gently toss the chicken in the glaze to ensure every piece is evenly coated. Use a spatula to turn the chicken, allowing it to absorb the sauce thoroughly.
Timing for Optimal Glazing
The timing of this step is essential. Allow the chicken to simmer in the glaze for about 2-3 minutes. This not only warms the chicken through but also allows the flavors to meld beautifully. Visual cues will help you determine when the chicken is adequately glazed: look for a shiny, caramelized coating that clings to the chicken.
Ensuring Even Coating
To achieve an even glaze, make sure to turn the chicken pieces occasionally in the skillet. This will help all sides get the same delicious coating. The chicken should be heated through and glistening before serving, signaling that it’s ready to delight your taste buds.
Garnishing and Serving Suggestions
A well-garnished dish can elevate the dining experience, making the meal as visually appealing as it is delicious. Here are some creative ideas for garnishing your sticky orange glazed chicken:
Creative Garnishing Ideas
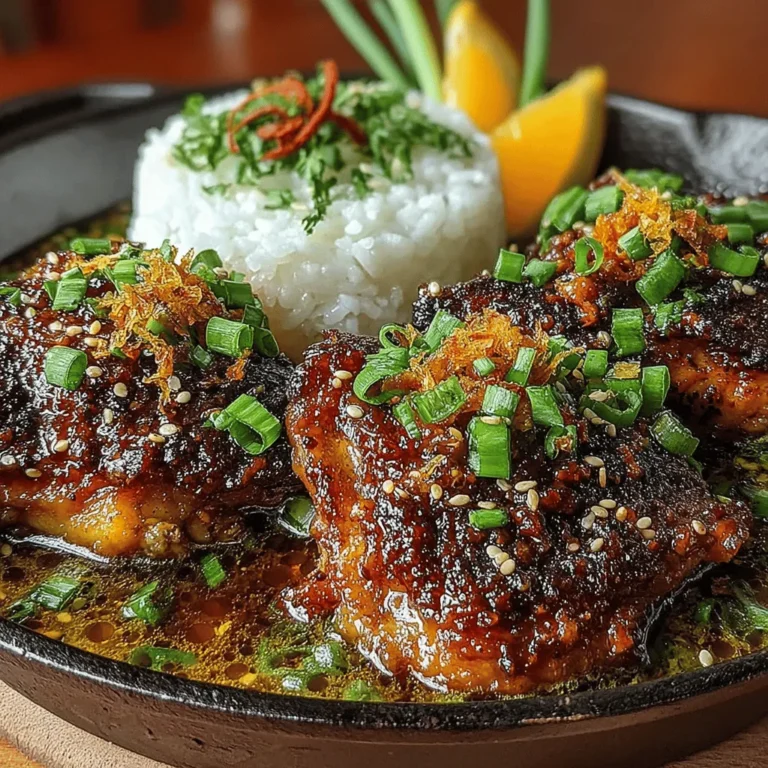
– Green Onions: Finely slice fresh green onions and sprinkle them over the glazed chicken for a pop of color and a hint of freshness.
– Sesame Seeds: Toasted sesame seeds add a delightful crunch and a nutty flavor that complements the sweetness of the glaze.
– Cilantro: Fresh cilantro can add a burst of color and a fresh herbaceous note that enhances the dish’s flavor profile.
Recommended Side Dishes
To create a complete meal, consider pairing your sticky orange glazed chicken with side dishes that complement its flavors:
– Steamed Jasmine Rice: The delicate texture of jasmine rice absorbs the glaze beautifully, making it an ideal pairing.
– Stir-Fried Vegetables: A mix of colorful bell peppers, broccoli, and snap peas adds a nutritious crunch and balances the sweetness of the chicken.
– Cauliflower Rice: For a low-carb option, cauliflower rice can be a great alternative that still provides a neutral base for the flavorful chicken.
Presentation Tips
For an impressive presentation, serve the sticky orange glazed chicken on a large platter. Arrange the chicken pieces beautifully and drizzle the remaining glaze over the top. Garnish with green onions and sesame seeds for added color. This not only makes the dish visually appealing but also invites your guests to dig in.
Nutritional Information
Understanding the nutritional content of your meals can help you make informed choices. Here’s a breakdown of the nutritional information per serving of sticky orange glazed chicken:
– Calories: Approximately 350 calories
– Protein: 30g
– Fat: 12g
– Carbohydrates: 25g
– Fiber: 2g
– Sugar: 8g
– Vitamin A: 15% of the Daily Value (DV)
– Vitamin C: 30% of the DV
– Iron: 10% of the DV
Benefits of Balanced Meals
This sticky orange glazed chicken provides a balanced meal with a good source of protein from the chicken, healthy fats from the sesame seeds (if used), and carbohydrates from the rice or vegetables served alongside. Incorporating a variety of colorful vegetables ensures you receive essential vitamins and minerals, contributing to overall health and well-being.
Conclusion
Sticky orange glazed chicken is not just a meal; it’s a delightful culinary experience that combines sweet, savory, and tangy flavors in one dish. The ease of preparation makes it perfect for weeknight dinners, while its vibrant presentation makes it suitable for entertaining guests.
Encouraging creativity in the kitchen, this recipe invites you to explore various variations, whether by adding different vegetables, adjusting the glaze’s sweetness, or trying it with alternative proteins. As you enjoy cooking with fresh, wholesome ingredients, remember the joy that comes from sharing a delicious meal with loved ones.
Embrace the simplicity and deliciousness of sticky orange glazed chicken and make it a staple in your home. Your family will surely appreciate the effort, and soon enough, it may become one of their favorite dishes!
